Have you ever wanted to impress your family and friends with a dessert that looks as stunning as it tastes? Well, let me introduce you to the delightful Bolo de Vidro! This colorful cake is not only a feast for the eyes but also a treat for the taste buds. As someone who loves to whip up easy pasta recipes for quick family dinners, I can assure you that this dessert is just as simple and rewarding. So, roll up your sleeves, and let’s dive into this delicious adventure!
Why You’ll Love This Recipe
- It’s visually stunning and perfect for any occasion.
- Easy to make, even for beginners!
- Can be customized with your favorite flavors and colors.
- Great for impressing guests at dinner parties.
- Pairs wonderfully with a cup of coffee or tea.
Ingredients
To create this beautiful Bolo de Vidro, you’ll need the following ingredients:
- 2 cups of all-purpose flour
- 1 cup of sugar
- 1 cup of milk
- 1/2 cup of vegetable oil
- 3 large eggs
- 1 tablespoon of baking powder
- 1 teaspoon of vanilla extract
- Food coloring (various colors)
- Whipped cream for topping
Full ingredient list with measurements is provided in the printable recipe card below.
How to Make the Recipe
Now, let’s get to the fun part—making the Bolo de Vidro! Follow these simple steps:
- Preheat your oven to 350°F (175°C) and grease a round cake pan.
- In a large mixing bowl, combine the flour, sugar, baking powder, and a pinch of salt.
- In another bowl, whisk together the milk, vegetable oil, eggs, and vanilla extract until well combined.
- Gradually add the wet ingredients to the dry ingredients, mixing until smooth.
- Divide the batter into separate bowls, depending on how many colors you want to use.
- Add a few drops of food coloring to each bowl and mix until you achieve your desired shades.
- Pour the colored batters into the prepared cake pan, alternating colors to create a marbled effect.
- Bake for 30-35 minutes or until a toothpick inserted in the center comes out clean.
- Let the cake cool completely before removing it from the pan.
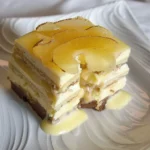
- Top with whipped cream and additional colorful decorations if desired.
Pro Tips for Making the Recipe
Here are some of my favorite tips to ensure your Bolo de Vidro turns out perfectly:
- Make sure your ingredients are at room temperature for better mixing.
- Don’t overmix the batter; a few lumps are okay!
- Experiment with different flavor extracts like almond or lemon for a unique twist.
- For a fun presentation, layer the cake with different colored whipped cream.
- Consider making this cake a day ahead; it tastes even better the next day!
How to Serve
Serving your Bolo de Vidro is just as fun as making it! Here are some ideas:
- Slice it into wedges and serve with a dollop of whipped cream.
- Pair it with fresh berries for a refreshing contrast.
- Serve it alongside a cup of coffee or tea for a delightful afternoon treat.
- For special occasions, add edible glitter or sprinkles for extra flair!
Make Ahead and Storage
If you’re planning for a busy week, this cake is perfect for making ahead! Here’s how to store it:
- Wrap the cooled cake tightly in plastic wrap and store it in the refrigerator for up to 3 days.
- You can also freeze the cake for up to 2 months. Just make sure to wrap it well!
- Thaw the cake in the refrigerator overnight before serving.
- For best results, add whipped cream just before serving to keep it fresh.
Now that you have the complete guide to making Bolo de Vidro, I hope you feel inspired to try this colorful dessert! It’s a fantastic addition to your repertoire of weeknight dinner ideas and will surely impress your family and friends. And remember, if you’re looking for more quick family dinners or 30-minute meals, don’t hesitate to check out my collection of creamy garlic pasta and other easy pasta recipes. Happy baking!
Bolo de Vidro: O Guia Completo
Ingredients
Liquid Ingredients
- 0.42 cup water (#1)
- 0.4 tablespoon gelatin in powder (clear and flavorless)
- 0.63 cup glucose syrup (transparent)
- 0.63 cup sugar (crystal)
- 0.3 cup water (#2)
- 0.42 cup sweetened condensed milk
- 0.66 cup white chocolate (chopped)
Colorings
- gel food colorings in desired colors
Cake and Frosting
- 1 recipe Basic Chocolate Cake
- 2 recipes Swiss Meringue Buttercream
- 1.5 cup fresh passion fruit pulp (~750g) (about 4 units)
- 1.06 ounce milk chocolate (or semi-sweet)
Instructions
- Prepare the gelatin with water and dissolve completely.
- Heat glucose, sugar, and water until dissolved, then combine with gelatin.
- Melt white chocolate and mix with passion fruit pulp.
- Layer the gelatin mixture with chocolate and passion fruit in a mold, then refrigerate until set.